One of the most iconic and amazing hikes in Chile is the Mirador Las Torres (‘viewpoint of the towers’), and it can be done as either a 1 day hike or as part of the W trek, which takes 4 to 5 days.
If you’re visiting Torres Del Paine on a budget and want to do this hike without a car, the good news is that you can also do it by bus in a single day, even if you’re staying in the town of Puerto Natales.
That’s what I did, and it was a highlight of my recent trip to Patagonia. The hike is challenging and it takes a full day, but it pays off with awesome views of the three granite towers and the turquoise lake.
This travel guide will explain how to do it step by step!
Quick Stats*
- Distance: 20 kilometers (12.5 mi)
- Elevation Gain: 1,015 meters (3,325 ft)
- Max Altitude: 870 meters (2,860 ft)
- Duration: 6 – 10 hours
- Difficulty: Hard
*These are total roundtrip stats for the day hike

Torres Del Paine National Park — the ‘towers of blue’
How To Get There
First of all, the closest airport to the park is in the town of Puerto Natales (PNT), which has daily flights from Santiago and Puerto Montt. You can shop for flights on Skyscanner.
There’s also a bus route to Puerto Natales from El Calafate, on the Argentine side of Patagonia. That’s what I did and it was pretty easy and comfortable. The trip takes 6 hours and you can book it here.
Once you arrive in Puerto Natales, you can get to the Las Torres hike by car, tour, or bus. I’ll explain each of these options below.
• By Car
Renting a car is the easiest and most flexible way to get to the towers hike.
There are many companies offering car rentals in this area, but my personal recommendation is DiscoverCars.
If it fits in your budget, you can even stay directly at the pricey Hotel Las Torres, which is located right at the start of the trail!
Otherwise, if you’re coming from Puerto Natales, it’s a 2 hour drive to the Torres Del Paine Welcome Center (map here), where you’ll start the hike.
• By Tour
A guided tour is another convenient option if you don’t want to mess with a rental car or bus, and the prices are pretty reasonable.
GetYourGuide has a day tour to Base Las Torres that includes hotel pickup and drop-off from Puerto Natales, and a bilingual guide to lead you to the towers.
We’ve used this company for lots of tours and activities around the world, and they’re great. Highly recommended!
Book Now: Torres Day Hike From Puerto Natales

The blue lake at Lago Torres
• By Bus
The cheapest way to get to the towers hike from Puerto Natales is by bus and shuttle.
You can book the bus online here, and a roundtrip ticket costs about 28,000 pesos (~$30 USD) as of 2026. I’d recommend booking your tickets at least a month in advance.
The bus station is called Terminal Rodoviario (map here) and it’s centrally located in Puerto Natales. I stayed at a budget friendly hotel within walking distance of the station.

The buses look like this
There are lots of bus departures every day, but since the hike is a long one, you’ll need to take the earliest departure and the latest return, that way you have plenty of time to complete the hike and still catch your return bus.
The first bus leaves Puerto Natales at 6:30 or 6:45 AM, arriving in Torres Del Paine (Laguna Amarga) 2 hours later, at 8:30 or 8:45 AM.
I took this bus several times while visiting the park, and it was always on schedule, even though there was some road construction along the way.

Comfy seats
One of the nice things about going by bus is that you can relax and let someone else handle the driving.
I don’t really enjoy driving in a foreign country, especially if it’s early in the morning when I’m still waking up.
On the bus, you can tune out and maybe even get some sleep while you’re en route to the park, which is helpful for a big hike like this.
The park office at Laguna Amarga
Once you arrive at the checkpoint at Laguna Amarga, the rangers from TDP will check your park tickets as you get off the bus.
I highly recommend buying your tickets online to save time on this step. You can buy them on the official website here.
If you need a minute, the building at Laguna Amarga has clean bathrooms and free Starlink WiFi. Here’s a map of the location.

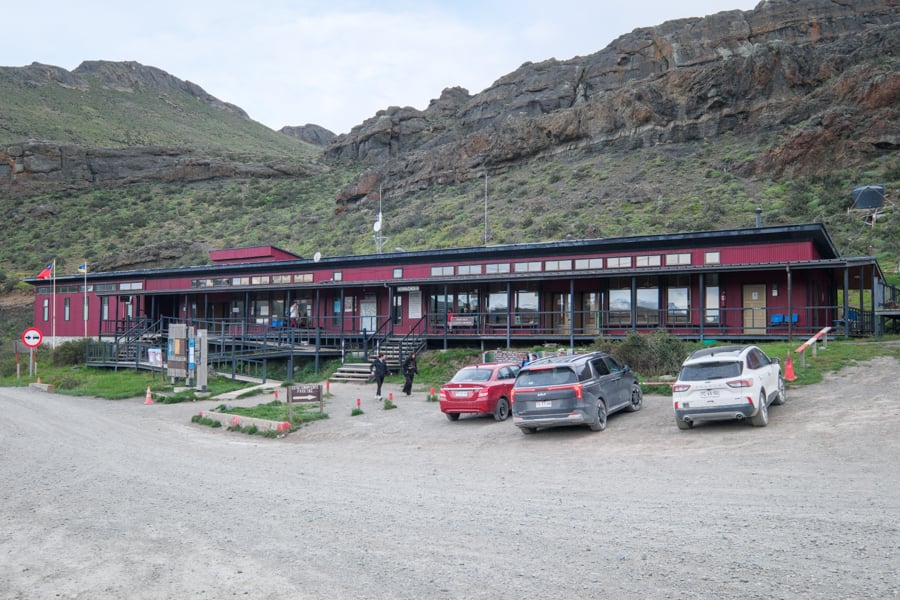
Welcome center
Next, you need to catch a shuttle van from Laguna Amarga to the Torres Del Paine Welcome Center (map here). It’s too far to walk.
The shuttle is a 15 minute drive and it costs 4,500 pesos in cash, as of 2026. You can’t book it in advance, but there’s no need since there are regular shuttles in each direction.
Again, there are restrooms and WiFi at the Welcome Center, plus a cafe, food truck, and souvenir shop.

Cafe & souvenir shop
The Welcome Center is where you start hiking to the towers. Here’s a map from AllTrails showing the full hiking route.
I got off the shuttle at the Welcome Center and started hiking at exactly 9 AM, reached the Refugio Chileno at 10:30 AM, and the lake at 12:30 PM. My pace was probably a little above average, but nothing crazy.
I stayed at the lake for almost 2 hours, resting and taking pictures, before starting back at around 2:30 PM.
I arrived back at the trailhead and the Welcome Center 3 hours later, a little past 5:30 PM.

Follow the signs for Mirador Las Torres
The last shuttle from the Welcome Center back to Laguna Amarga is at 7 PM, so you don’t want to miss it; and the last return bus from Laguna Amarga to Puerto Natales is at 8:15 PM, so you don’t want to miss that either.
In total, this plan will give you basically 10 hours of free time to hike to the towers and back, assuming you take the first morning bus and hit the trail at 9 AM like I did, and go back to Laguna Amarga on the last shuttle at 7 PM.
That’s pretty generous. Don’t dawdle, but 10 hours should be plenty of time for most people to complete this hike comfortably!
Keep in mind the last bus will put you back in Puerto Natales town at around 10 PM. Yes, it’s late, but you won’t be the only tourist walking around, and some restaurants will still be open.

Valley views on the way to the towers
Map Of The Trail
Here’s a map from AllTrails that shows the complete hiking route and elevation profile for the Base Las Torres day hike, starting from the TDP Welcome Center.
This is the trailhead where the hike always starts and ends, regardless of whether you go with a rental car, tour, or bus.
If you sign up for AllTrails Plus, you can download the map and use it offline while hiking. It’s very handy!
What To Expect: Hiking To Mirador Las Torres
• Trailhead To Refugio Chileno
The hike starts with a flat walk through some meadows and past the Hotel Las Torres, with distant views of the mountains in the background. It stays mostly flat like this for about 2.5 kilometers (1.5 miles).
Next, there’s a steady uphill climb for another 2.5 kilometers until you reach the Windy Pass, which is where you’ll encounter the first great views of the hike, with a river cutting through the valley and snow-capped mountains on both sides.
After walking through the pass, you’ll reach the Refugio Chileno, where you can rest a minute. The Refugio is an overnight lodge with a restaurant, and it also has WiFi and toilets for a fee.

A bridge crossing near the start of the hike

First mountain views
• Refugio Chileno To Lake Of The Towers
From the Refugio, you’ll walk through a forest with a gradual incline for the next 3 kilometers until you reach a clearing, where the path forks uphill to Base Las Torres.
There’s a cut-off time to go past this point, so if you get here after 2 PM, they won’t let you go to Las Torres. Even if you’re only 10 minutes late, the rangers will turn you around, so keep that in mind.
In the summer, the cut-off time is a more lenient 3 PM because of longer daylight hours.

There’s a cut-off time to hike past this sign

The trail gets rough near the end
This is where the trail gets steep and rocky. This last kilometer is definitely the hardest part of the whole hike. It’s safe, but it’s strenuous and you need to be careful not to step on any wobbly rocks.
Finally, you’ll reach Lago Torres, the lake of the towers! It’s a stunning view, and even though it gets pretty busy during the day, there are plenty of great photo spots around the lake.
The weather here can change in a second, so don’t be discouraged if the towers are covered in clouds when you first get to the lake. That happened to me, but I waited awhile and the towers came out!
Enjoy a snack break here after the long climb. The return hike is entirely flat or downhill, so it’s much easier!

First peek of the towers


Resting on a giant boulder near the lake
Can You Hike Independently?
Yes, you can do this hike on your own. A guide isn’t required except during the winter months, from May to September.
Just remember you need a ticket for the national park, which you can buy on the official website here. It’s valid for 3 days.
Best Time To Go
The best time to visit Torres Del Paine is during the spring (September to November) or fall (March to May). Summer is good too, but the trails are more busy.
I went in early November, and that was pretty much perfect.
The weather was great, and I liked how there was still some snow and ice skirting the base of the towers. It looked extra nice for photos.

Base Las Torres
What To Bring
- Layers. The weather in Patagonia is notoriously unpredictable and it can be extremely windy, so you’ll want to bring a jacket, gloves, and hat in case it gets cold. You probably won’t need these for most of the trail, but you’ll be happy to have them at the lake if the wind picks up.
- Snacks. Even though you can buy food at the Welcome Center or Refugio, it’s overpriced for tourists. Better to bring your own snacks to eat on the hike. I brought beef jerky and energy bars from the U.S. and they were great to have.
- Hiking Poles. I didn’t bring these, but they could be helpful for your knees on the steep ascents and descents.
- Water. A good amount to carry is probably 2 liters of water. There are glacial streams available near the Refugio, but I’d use a filter or purification tablets to be safe.

River running through the valley
More Patagonia Travel Guides
Thanks for looking! I hope you enjoyed this guide for how to do the Mirador Las Torres day trip from Puerto Natales.
Don’t forget to check out my other travel guides for Patagonia before you go!

1 comment
This was so interesting to read. Great guide.